Imagine the soft, comforting feel of flannel in your hands. Now, picture transforming that warmth into adorable letters for your baby’s toys.
Not only do these flannel letters serve as a delightful tactile experience, but they also become a learning tool for your little one. Creating flannel letters is simpler than you might think, and you don't need to be a crafting expert to get started.
In this guide, you’ll discover step-by-step instructions to craft these charming letters, perfect for sparking your child’s imagination and development. Get ready to dive into a project that’s not just about making toys, but about creating cherished memories. Are you curious to see how easy and rewarding this project can be? Let’s get started!

Credit: www.walmart.com
Materials Needed
Gather fabric scissors, flannel sheets, and sewing thread for crafting flannel letters. A sewing needle and pattern template help shape the letters accurately.
When creating flannel letters for a baby toy, gathering the right materials is crucial. Having everything on hand streamlines the crafting process. This section breaks down the essential materials. Let's dive into the details.
Flannel Fabric Options
Choose soft flannel for comfort and safety. Consider bright, engaging colors. Patterns like stripes or polka dots add visual interest. Opt for high-quality fabric for durability. Ensure it's machine washable for easy cleaning.
Tools And Equipment
You'll need sharp fabric scissors for precise cuts. A sewing machine speeds up the process. Use sewing needles for hand-stitching details. An iron helps smooth wrinkles and seams. Pins keep fabric layers in place while sewing.
Additional Supplies
Gather matching thread for seamless stitching. Use stuffing for a plush feel. A fabric marker helps outline letters. Velcro or snaps can attach letters to toys. Store all supplies in a box for easy access.

Credit: www.amazon.com
Design And Template Creation
Crafting flannel letters for baby toys involves creativity and precision. Start with a sturdy template, ensuring each letter is clear and bold. Use colorful flannel fabric to cut out letters, adding a playful touch to the toy.
Creating flannel letters for a baby's toy is not only a fun DIY project but also a great way to add a personal touch to your child's playtime. The key to success lies in the design and template creation. This process involves choosing the right alphabet style, making your own templates, and considering the size of each letter. Each step allows you to customize the letters to fit your vision and your child's needs. Whether you're crafting these letters as a gift or for your own child, this guide will help you bring your creative ideas to life.
Choosing The Alphabet Style
The style of the alphabet you choose sets the tone for your entire project. Are you going for a classic look, or do you prefer something more whimsical? Think about how the letters will complement other toys or décor in your child's room. You could choose a traditional serif font for a timeless feel or opt for a playful, rounded style to keep it lighthearted. The style should be visually appealing and easy for your child to recognize as they learn.
Making Your Own Templates
Crafting your own templates gives you complete control over the final product. Start by sketching the letters on paper or using a computer program to create digital templates. Print them out and cut each letter carefully. This method allows you to adjust the size and style to your liking. Personal experience has taught me that making templates by hand can be therapeutic and rewarding. It also ensures that each letter is unique and tailored to your project.
Sizing Considerations
Size is a critical factor in designing flannel letters. Too small, and they may pose a choking hazard; too large, and they could be cumbersome for little hands. Aim for letters that are large enough for safe play but small enough to be easily handled by your child. Consider the age and developmental stage of the child who will be using the toy. A good rule of thumb is to make each letter between 4 to 6 inches tall. This size is manageable and helps in developing fine motor skills. What do you think will capture your child's interest most—a bright, bold alphabet or something softer and pastel?
Cutting The Flannel
Cutting the flannel for baby toy letters is a delightful craft that can bring a personal touch to your little one's playtime. Imagine the joy of creating something from scratch that your baby can interact with. This process requires precision and care, ensuring each letter is crafted perfectly for safety and aesthetics. As you embark on this creative endeavor, you'll find that the cutting stage is crucial in achieving the desired look and feel. Let's dive into the essential steps for cutting flannel with precision and ease.
Tracing The Templates
Begin by gathering your templates. You can use stencils or create your own by sketching letters on sturdy cardboard. Make sure each template is the right size for small hands to grasp.
Place your flannel fabric on a flat surface and pin your template securely. This ensures the fabric doesn't shift while tracing. Use a fabric marker or chalk to outline the letters.
It's important to trace accurately. This will guide your cutting and ensure each letter is uniform. Remember, a clear outline is your roadmap to precision cutting.
Precision Cutting Techniques
Once you've traced the templates, it's time to cut the flannel. Use sharp fabric scissors for clean edges. Dull scissors can lead to frayed fabric and uneven lines.
Take your time with each cut. Follow the traced lines closely and avoid rushing. This helps maintain the shape and integrity of each letter.
Consider cutting on a cutting mat for added stability. This can prevent accidental snips and protect your work surface. How precise can you be with your cuts? Challenge yourself to make each letter as neat as possible.
Cutting flannel letters for baby toys is not just a craft, but an opportunity to create something memorable and tactile for your child. With careful tracing and precise cutting, you can ensure your handmade letters are safe, soft, and engaging for your baby. Have you ever tried crafting flannel letters before? What tips would you share to ensure precision in cutting? Your insights could help others in their creative journey.
Sewing The Letters
Creating flannel letters for baby toys adds a personal touch. These letters are soft and safe for little hands. Sewing them requires simple steps and tools. You need a sewing machine, flannel fabric, and thread. Each step ensures the letters are durable and charming.
Stitching Methods
Choose a straightforward stitch for flannel letters. Straight stitches work well. They are strong and easy to sew. Zigzag stitches add flair and extra hold. Both options help secure the fabric edges. Experiment with different stitches to find your favorite.
Stuffing The Letters
Once stitched, fill the letters with soft stuffing. Use cotton or polyester fiberfill. These materials keep the letters plush and squeezable. Stuff each letter evenly for a smooth shape. Avoid overstuffing to keep seams intact. Check that the stuffing is evenly distributed.
Closing The Seams
Finish by closing the seams tightly. Use small, neat stitches for a clean look. Double-check each seam to prevent gaps. This ensures the stuffing stays inside. Carefully trim any excess thread. The final product should look tidy and secure.
Finishing Touches
Completing your flannel letters for a baby toy involves adding final touches. These details enhance the toy's appeal and ensure it is safe for babies. Pay attention to aesthetics and safety to create a delightful and secure plaything.
Embellishments And Decorations
Choose vibrant colors for embellishments that catch a baby's eye. Sew small patches or embroider cute patterns on each letter. Use felt shapes like stars or hearts for a playful look. Ribbons or lace can add texture and charm. Ensure decorations are securely attached to prevent choking hazards.
Safety Tips For Baby Toys
Ensure all materials are non-toxic and baby-friendly. Avoid small parts that might detach and pose a choking risk. Stitch seams tightly to prevent unraveling during play. Inspect the toy regularly for wear and tear. Prioritize safety over decorative elements to keep your little one safe.
Assembling The Toy
Crafting flannel letters for a baby toy can be a fun and creative project. Cut flannel fabric into letter shapes and sew them together, creating soft, tactile pieces. These colorful letters can enhance learning and play for your little one.
Assembling the toy is a rewarding step in making flannel letters for a baby's toy. It's where creativity meets function, allowing you to transform simple fabric pieces into playful and meaningful objects. Whether you're crafting a mobile or garland, the assembly process is where your vision comes to life. As you start to bring your project together, consider how the finished product will look and feel. How will it engage and delight the baby? Let's dive into the practical steps to make your flannel letters come alive.
Stringing The Letters Together
Begin by laying out your letters in the order you want them to appear. This helps visualize the final design and ensures a coherent look. Once arranged, cut pieces of string or yarn to the desired length. Make sure they're long enough to accommodate all your letters with some space in between. Thread each letter carefully, ensuring they're securely attached. Use strong knots or double-knotting to prevent any letters from slipping off. Consider adding small beads or colorful pom-poms between letters for added flair. This simple touch can enhance the toy's appeal and stimulate a baby's curiosity.
Creating A Mobile Or Garland
Decide on the final form: will your letters hang as a mobile or stretch across a garland? Each option offers unique benefits and visual impact. For a mobile, attach your stringed letters to a circular frame. You can use a hoop, stick, or even an embroidery ring. This allows the letters to hang freely and catch the light, creating gentle movement that fascinates babies. If a garland is more appealing, secure the string at each end to create a banner-like effect. This is perfect for draping across a crib or nursery wall, adding a personal touch to the space. Think about incorporating other elements like bells or soft fabric shapes. These additions can enhance the sensory experience for the baby, making the toy not just visually appealing but also audibly engaging. As you assemble, reflect on your personal experiences with toys. What made them memorable for you? How can your creation spark joy and imagination in a child?
Care And Maintenance
Creating flannel letters for baby toys involves careful cutting and sewing. Regularly check for loose threads to ensure safety. Clean the flannel gently with mild soap and water to keep it fresh for playtime.
When crafting flannel letters for a baby toy, it's essential to ensure they remain in top condition for safe and enjoyable play. These letters are not just cute and cuddly; they're a bridge to learning and fun. But like all good things, they need a little TLC to stay at their best. How do you keep them clean and fresh? What can you do when they start to show signs of wear? Let’s dive into the practical steps for caring and maintaining these delightful educational tools.
Cleaning The Flannel Letters
Keeping flannel letters clean is crucial since babies love to explore with their mouths. Hand wash the letters with mild soap and lukewarm water. This gentle approach ensures the fabric stays intact while removing dirt and germs. You might consider using a soft-bristled brush to scrub any stubborn spots. Rinse thoroughly to remove all soap residues, then gently squeeze out excess water. Air dry the letters by laying them flat on a clean towel. This method helps preserve their shape and avoids the risk of melting or warping that can occur in a dryer.
Repairing Wear And Tear
Flannel letters might experience fraying or small tears over time. Don't worry; a few simple stitches can work wonders. Use a needle and thread that matches the flannel's color for a seamless repair. If you notice a letter losing its stuffing, consider adding a bit more polyester filling before stitching it up. This small effort can breathe new life into the letter. If sewing isn’t your forte, fabric glue can be a quick fix for minor frays. Have you noticed that some letters get more love than others? Maybe your baby loves the letter 'B' because it's part of their name. Keep an eye on these favorites, as they might need extra attention to ensure they stay safe and snug. Engage with your flannel letters regularly to spot any potential issues early. They’re not just toys; they’re learning companions for your little one. By maintaining them well, you ensure they remain inviting and educational. What’s the next step you’ll take to care for your baby’s flannel letters?
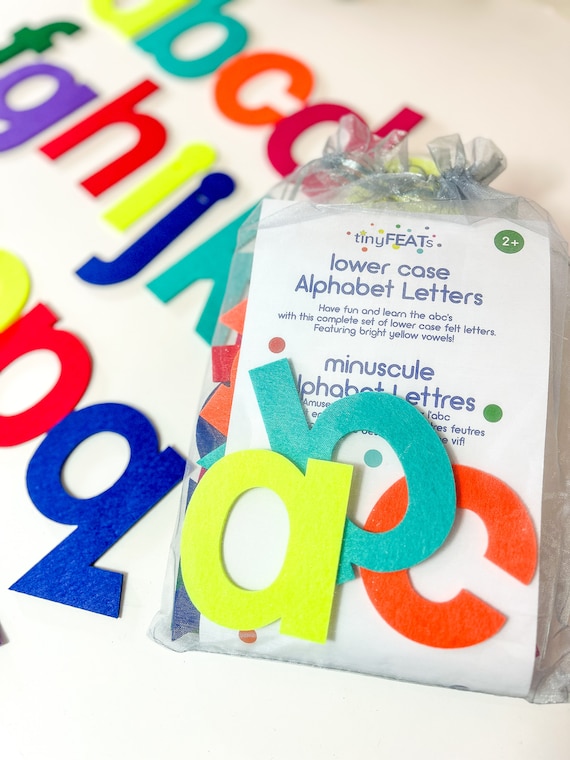
Credit: www.etsy.com
Frequently Asked Questions
What Materials Are Needed For Flannel Letters?
To make flannel letters, you'll need flannel fabric, scissors, a sewing needle, thread, and stuffing. Optionally, you can use fabric glue or a hot glue gun for quick assembly. Ensure you have a stencil or template for accurate letter shapes and a ruler for precise measurements.
How Do You Cut Flannel Letters Accurately?
Use a stencil or template for precise shapes. Trace letters onto the flannel fabric with a fabric pencil. Carefully cut along the traced lines using sharp scissors. For best results, ensure the fabric is flat and smooth before cutting.
Can You Sew Flannel Letters By Hand?
Yes, you can sew flannel letters by hand. Use a needle and thread, opting for a backstitch for durability. Sew the edges of two flannel letter shapes together. Leave a small opening for stuffing before closing it completely.
How To Stuff Flannel Letters Properly?
Use polyester fiberfill for stuffing flannel letters. Gently push the stuffing into the letter through a small opening. Ensure the stuffing is evenly distributed for a smooth and uniform appearance. Close the opening with a needle and thread once satisfied with the fullness.
Conclusion
Creating flannel letters for baby toys is simple and fun. These colorful letters enhance playtime and learning. You only need basic sewing skills and materials. Flannel letters make thoughtful gifts too. They add a personal touch to any toy collection.
Children love playing with soft, colorful shapes. Parents appreciate these durable, safe toys. Get creative with patterns and colors. Your child will enjoy learning through play. Crafting these letters is a rewarding experience. Start today and see the joy they bring.
Perfect for sparking curiosity and development in young minds. Happy crafting!