


Imagine the thrill of creating your very own remote-controlled toy car. It’s easier than you think!
With just a few materials and a bit of guidance, you can build a toy car that zips around at your command. Whether you're looking for a fun project to do with your kids or wanting to dive into a new hobby, this guide is perfect for you.
Get ready to impress yourself and your friends with your creativity and newfound skills. As you follow along, you'll discover the joy of building something from scratch and the satisfaction of seeing it come to life. So, are you ready to start your exciting journey into the world of DIY remote-controlled cars? Let's get started!
Materials Needed
Creating a toy car requires several materials. Gather a small motor, wheels, a plastic or cardboard base, remote control kit, batteries, and some wires. These items are essential for building a basic toy car with remote control.
Creating your own remote-controlled toy car can be an exciting and rewarding project. Before you begin, gathering the right materials is crucial to ensure your toy car is both functional and fun to operate. In this section, we'll outline the essential parts you'll need, as well as some optional accessories that can enhance your creation. Whether you're building this for yourself or with a young enthusiast, having a clear list will make the process smoother and more enjoyable.
Essential Parts
To start building your remote-controlled toy car, you'll need a few basic components. A chassis is crucial as it forms the structure of your car. You can repurpose an old toy car's base or use a simple piece of wood or plastic. Wheels and axles are next on the list. Ensure they are proportionate to your chassis. This will keep your car stable and smooth on different surfaces. A remote control system is the heart of your toy car. You'll need a transmitter and a receiver. You can purchase these as a set from hobby stores or online. Make sure they are compatible with each other. Don't forget the electric motor. This is what drives your car. A small DC motor is usually sufficient for toy cars. Pair it with a battery pack to power your vehicle. Finally, consider the steering mechanism. Simple setups use a rack and pinion system or a servo motor. These are available in most electronics or hobby stores.
Optional Accessories
If you want to make your toy car stand out, consider adding some optional accessories. LED lights can add a cool effect, especially if you plan on driving your car in low-light conditions. They are simple to install and don't draw much power. Adding a paint job or decals can personalize your car. Use spray paint or stickers to give it a unique look. This not only makes the car look better but also adds a layer of protection to the body. You might also consider suspension springs. These can improve the car's handling and make it more enjoyable to drive over uneven surfaces. They are particularly useful if you plan to race your car outdoors. Finally, think about sound effects or a mini speaker system. This can be a fun addition, making your car roar like a real vehicle or play music while it runs. What unique touches will you add to your toy car? Will you stick to the basics or explore creative options? The choice is yours!
Preparing The Car Body
Crafting the toy car body involves shaping lightweight materials like plastic or cardboard. Cut and assemble these components to form the car's structure. Ensure the body is sturdy yet light for optimal performance.
Preparing the car body is a crucial step in building your remote-controlled toy car. It’s the foundation upon which all other components will be added. This part of the process requires creativity and precision. Think of it as crafting the canvas for your masterpiece. With the right base and structure, your car will be both functional and eye-catching.
Choosing The Base
Start by selecting a sturdy base for your car. You might want to use a piece of cardboard or a lightweight plastic. Both are affordable and easy to work with. If you’ve ever made a school project, think back to how you chose materials that were both strong and flexible. Consider the weight of the base. Too heavy, and your car won’t move efficiently. Too light, and it might be too fragile. Look around your house for materials that strike a balance. An old plastic container or a wooden block can work wonders. Ask yourself: What material will withstand the bumps and turns of your living room racetrack? Choosing wisely now saves you from headaches later.
Designing The Structure
Designing the structure is where your creativity shines. Sketch a simple design that outlines where the wheels, battery, and motor will go. This visualization will help guide your assembly process. If you’ve ever doodled in a notebook, you know how a rough sketch can spark ideas. Think about the shape of your car. Should it be sleek and fast, or robust and adventurous? Each style has its own charm and functionality. Use household items like bottle caps for wheels or old electronic parts for added flair. It's these personal touches that will make your toy car unique. Remember, you're not just building a car; you're crafting a personal creation. As you design, consider: How can you make your car stand out? What unique features can you add? Your choices here will determine the final look and feel of your toy car.
Installing The Wheels
Installing the wheels is a crucial step in building a remote control toy car. The wheels allow the car to move smoothly and navigate different surfaces. Ensuring they are installed correctly will make your car more efficient. This section will guide you through the steps to attach axles and secure wheels.
Attaching The Axles
Begin with selecting strong, straight axles. They should match your car's body size. Insert the axles through the holes in the car's body. Ensure they rotate freely without wobbling. This will help the car move smoothly.
Use a small amount of adhesive to secure the axles in place. Wait for it to dry. This will prevent the axles from shifting during movement. Check their alignment once more before proceeding.
Securing The Wheels
Choose wheels that fit snugly on the axles. Push each wheel onto the axle carefully. Make sure they are secure and do not fall off easily. You might need to use small nuts or clips to keep them in place.
Spin the wheels to test their movement. They should rotate without any resistance. Adjust if necessary. Ensure the wheels are evenly spaced to avoid wobbling. Balanced wheels ensure a smooth ride for your toy car.

Credit: www.instructables.com
Building The Remote Control System
Create a simple toy car with remote control using basic materials. Assemble the motor, wheels, and remote. Follow step-by-step instructions for a fun, educational project.
Building the remote control system for your simple toy car is an exciting part of the project. It’s where technology meets creativity, allowing you to control your car with precision. Whether you're a seasoned hobbyist or a curious beginner, crafting this system is both rewarding and educational. Let’s dive into the essential steps that will empower you to steer your toy car remotely.
Selecting The Components
Choosing the right components is the foundation of your remote control system. You'll need a transmitter and a receiver set, which act as the brain of the operation. Opt for a basic radio frequency (RF) module that matches the range you need. Consider the power source for your remote. A standard 9V battery can be a practical choice. Ensure compatibility with the car’s motor to avoid any hiccups. Look at the controller interface. Will you use a joystick or buttons? Think about what feels intuitive for you. This personal touch can make the driving experience more enjoyable.
Connecting The Circuit
Start by mapping out your circuit on a piece of paper. Visualizing the connections helps prevent errors. Connect the receiver to the car's motor using jumper wires. Ensure the connections are secure to avoid loose ends. Next, integrate the power supply. Connect the battery to the circuit, making sure the positive and negative terminals are correctly aligned. This step is crucial for a smooth power flow. Test your setup. Turn on the remote and see if the car responds to your commands. This is the moment of truth. If it doesn't work initially, troubleshoot by checking each connection. A small tweak can lead to big improvements. By focusing on these steps, you set the stage for a functional and fun remote control system. What challenges do you anticipate, and how do you plan to overcome them? Remember, each step is a learning opportunity.
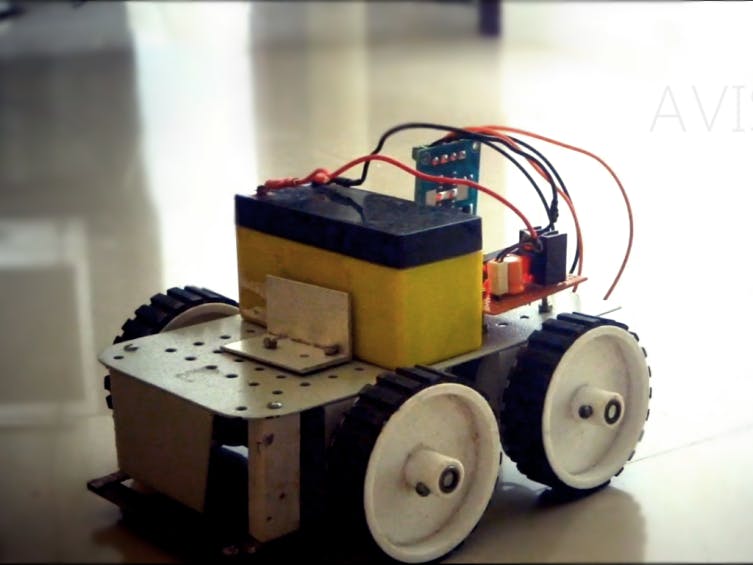
Assembling The Toy Car
Crafting a toy car with remote control offers a fun and educational experience. Gather basic materials like motors, wheels, and a remote control kit. Follow simple instructions to assemble and connect parts, bringing your miniature vehicle to life. Enjoy the satisfaction of watching your creation zoom across the floor.
Assembling a toy car with remote control can be a fun project. This process involves careful steps to ensure everything functions properly. With patience and precision, you'll see your toy car come to life. Let's dive into the key stages of assembly.
Mounting The Motor
First, focus on the motor. It powers your toy car. Place the motor into the designated slot. Ensure the fit is snug. This prevents unnecessary movement. Secure it with screws. Tighten them to avoid any loosening. Connect the motor wires to the battery compartment. Ensure the wires are correctly aligned. This step is crucial for power transfer. Verify the connections twice. A loose connection may cause issues later.
Integrating The Remote System
Next, integrate the remote system. This allows you to control the car. Begin by installing the receiver. Place it near the motor. Ensure it doesn't obstruct other parts. Connect the receiver wires to the motor. Follow the instruction manual closely. This ensures proper connectivity. Test the remote control. Make sure it communicates with the receiver. Move the controls to see the motor's response. Adjust any misalignments immediately. This guarantees smooth operation.
Testing And Troubleshooting
Testing and troubleshooting are crucial steps in building a remote control toy car. These steps ensure the car operates smoothly and meets expectations. It's important to conduct tests after assembly. This helps identify any issues early. Troubleshooting helps fix problems and improves the car's performance. Let's dive into the process of testing and troubleshooting.
Initial Test Drive
Begin by checking the remote control's range. Ensure it communicates with the car. Place the car on a flat surface. Test the forward and backward movements. Check the turning capabilities by steering left and right. Monitor the speed and responsiveness of the car. Observe any unusual noises or vibrations. These could indicate a problem.
Common Issues And Solutions
One common issue is poor battery connection. Ensure the batteries are properly installed. Check if the battery compartment is closed tightly. If the car does not move, examine the motor and wiring. Loose wires can cause a lack of power. Secure any disconnected wires. If steering is unresponsive, inspect the servo motor. Make sure it is properly aligned.
Slow speed can be due to low battery power. Recharge or replace the batteries if necessary. If the car moves in only one direction, check the remote control. Ensure the control sticks are functioning correctly. Inspect the wheels for any obstructions. Debris can impede movement and affect performance.
Personalizing Your Toy Car
Create your own remote-controlled toy car with just a few simple materials. Customize it by choosing colors, adding stickers, and attaching a small motor. Enjoy a fun project that sparks creativity and excitement.
Personalizing your toy car is where the fun truly begins. Once you've assembled the basics, it's time to let your creativity shine. Think about what makes a car truly unique. Is it the color? The sleek design? Or perhaps it's the added features that make it stand out? By customizing your toy car, you not only make it uniquely yours but also enhance the play experience.
Custom Paint And Decoration
Choosing the right paint can transform your toy car from ordinary to extraordinary. Start by selecting a color scheme that reflects your personality. Bright colors like red or yellow can make your car pop, while metallic shades give it a futuristic look. Consider adding decals or stickers to give your car more character. Racing stripes, flames, or even your initials can add a personal touch. If you're feeling adventurous, try painting designs freehand. Acrylic paints are easy to use and dry quickly, making them a great choice for beginners.
Adding Features
Why not take your toy car to the next level by adding new features? LED lights can make your car look cool and are simple to attach. Imagine how exciting it would be to race a car that lights up in the dark! Think about the functionality too. Adding a horn or sound effects can make playtime more interactive. Consider attaching small bumpers or a spoiler to mimic real-life cars. These enhancements can be easily done with household items like small batteries and aluminum foil. Personalizing your toy car is not just about aesthetics; it's about creating something that's truly yours. What features would make your toy car a reflection of your style and interests? Remember, the possibilities are endless, and the only limit is your imagination.
Credit: www.hackster.io

Credit: m.youtube.com
Frequently Asked Questions
How Can I Make A Simple Toy Car?
To make a simple toy car, gather basic materials like cardboard, wheels, and a motor. Assemble the parts using glue or tape. Connect the motor to a battery. Ensure the wheels are aligned. Test the car on a flat surface for smooth movement.
What Materials Are Needed For A Remote-controlled Car?
You'll need a small motor, wheels, a battery pack, and a remote control kit. Additional materials include cardboard or plastic for the car body. Wires and connectors are necessary for electrical connections. Ensure you have basic tools like scissors and glue.
How Do I Connect The Remote Control?
First, assemble the receiver and connect it to the motor. Ensure the remote control and receiver are paired. Follow the kit instructions carefully. Test the connection by turning on the remote. Adjust the settings if the car doesn't respond.
Can I Use Recycled Materials For The Car?
Yes, you can use recycled materials like plastic bottles or cardboard. These materials are eco-friendly and cost-effective. Ensure they are clean and sturdy. Use them for the car body or wheels. Recycled materials can give your car a unique look.
Conclusion
Creating a toy car with remote control is fun and rewarding. You learned simple steps to make your own. The process involved basic materials and easy techniques. Now, you can control your car with pride. Share the joy with friends and family.
Let them join in the fun. Building toys is a great way to learn. It's hands-on and exciting. Remember to be creative. Experiment with different designs. Enjoy the feeling of accomplishment. Your remote-controlled car is just the beginning. Keep exploring and building.
Discover more DIY projects. Create, play, and enjoy your new skills!


